Monday, November 21, 2011

Pressed Flower Votive Candle Holder Gift Idea

Flower pressing friends, here's a cool Christmas idea gift idea for you to make, that's unbelievable easy.  

1.  Glue a pressed flower of your choice onto each side of a triangle or square votive candle holder.  I tend to prefer Perfect Paper Adhesive for gluing, but in this case any white glue should be fine. I also recommend using flowers pressed in a Microfleur microwave flower press since they tend to retain more of their color.

2.  Tear a piece of white/translucent tissue paper into a square that will cover each flower by at least 1/8".  You could also cut the square, but the torn edges give a much nicer, "artsy" look.

3.  Cover one of the flowers plus an extra 1/8" of an inch around it with either matte Modge Podge, or Perfect Paper Adhesive.  Place a tissue paper square on top, press out any air bubbles, and then carefully apply another coat of either Modge Podge or PPA over the tissue paper.  Make sure to cover the edges of the tissue paper, but avoid getting excess on the glass. Repeat for each flower.  Allow to dry.

There you have it!  The tissue paper lends a certain whimsical look to the pressed flowers, and also helps protect the flowers.  Avoid using greens since they readily fade unless you add some kind of pigment - with either water color, or markers such as Prismacolors. 

For the candle holder above I used osteospermum flowers (a type of African Daisy) in several shades of purple. Which ever flowers you choose to use, be sure to have plenty on hand - everyone you know will want one of these!


Labels: , , , , , , ,

Friday, April 15, 2011

Pressing crocus and wild violets in the Microfleur flower press

"Hi Elizabeth, I love your blog and website and am ordering a microfleur press in the next day or two. I'd love to make my mom a mother's day card out of wild violets, but don't really know where to start. I looked at your crocus tutorial, but can't tell if you split the stem and flower into two parts, remove some leaves, or press the whole thing at once. Can you offer any advice for wild violets? They won't be here for long. Thanks so much." Melissa - Lawrence, KS

Hi Mel,

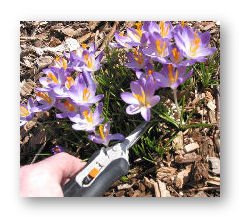
Thank you for your questions! First, regarding crocuses, I snip the crocus flower at the base of the stem, and I press the crocus whole - with out removing any of the petals.  Sometimes, if I cut low enough a few of the leaves are attached, and I press them too, but usually I need to cut extra leaves and press them separately.

Regarding wild violets, cut the stem as close to the ground as you can, so that you get a nice long stem (violet stems are so perfect! I also use them for other flowers that have gnarly stems). Then cut off the violet flower at the back, where the stem and the flower meet.  Be sure to cut some extra leaves as well.

If you are using the Microfleur, you will find the flowers will need more time in the microwave than the stems and the leaves, so press them separately.  I gently press the flowers between my thumb and index finger before laying them on the Microfleur pads, so that they lay nice and flat. In my microwave, I give them about 3-4 30 second bursts on high.  When I do the leaves and stems, they tend to only need one 30 second burst.

I hope this helps!  As always, feel free to let me know if you have any more questions.


Labels: , ,

Wednesday, March 23, 2011

In a matter of days... pressing crocuses in the Microfleur

12 x 12"
Pressed flowers on handmade paper
 
In a matter of days I will be pressing the first crocuses of the year (smile).  This winter has seemed unusually  l  o  n  g  to me, has it been that way for you? I'm hoping not. At any rate, my little purple crocuses have begun to peak out, and I am on the look out for the large yellow crocuses in the picture above which usually aren't far behind..

For those of you new to pressing flowers, you may want to check out my tutorial on pressing crocus flowers in the Microfleur.  Crocuses are delicate, but with care both the flowers and the classy stripped leaves press very well. This year, since Easter is so late, I will have plenty of time to make pressed crocus Easter cards.    

Labels: , , ,

Thursday, December 16, 2010

Pressed Flower Artists: A great tip, from a kind reader...


Back in September, Marj from Ontario emailed me with several questions about using Perfect Paper Adhesive (my go-to pressed flower sealant), but unfortunately she had one question I couldn't help her with.

She was having trouble using the PPA to seal pressed flowers that she had glued onto card stock, because in sealing the flowers with the PPA, a slight amount of PPA would get onto the card stock, causing it to warp. Because I glue my flowers onto my absorbent handmade paper, I've never dealt with warping, and didn't have an answer for her.  But, recently Marj emailed me again, with a solution for her problem:

"In September you kindly answered questions I had about the Perfect Paper Adhesive. I have been having great success with the product since then and am so grateful for your help. I think that I was probably using a bit too much initially. Sometimes I 'top coat' the plant material first, placing it on a piece of baker's parchment paper (which can be re-used many times) to dry without sticking. Then I adhere the chosen bits to my card design. It is so reassuring to think that they are then hardy enough for the postal service."
   
I love the idea of "top coating!" I can see that coming in handy for a number of different projects I have planned, especially one involving rice paper...  Marj also included the above Christmas card, and she says:

"...the 'balls' on the tree are hole punched from an autumn Bergenia leaf which turned a lovely red, and the star is a bit of Queen Anne's Lace."


Great ideas Marj!  Thanks so much for sharing them, and your art with us!

Labels: , , , ,

Thursday, November 18, 2010

Time to make gift tags...

For the past few Christmas seasons I've been offering free Christmas gift wrapping on all Microfleur flower presses and Going Green paper making kits, and I've always included a free handmade paper gift tag.  Sometimes it's a pressed fern/Christmas tree tag, other times a pressed Queen Anne's Lace flower/snowflake tag, either way, they are fun to make, and a great way to showcase two of my favorite things:  pressed botanicals and handmade paper.

Here's a quick tutorial of my favorite way of making handmade paper gift tags...


Labels: , , ,

Monday, July 13, 2009

What's so great about the Internet?


Free information at your finger tips - that's the single most valuable aspect of the internet, in my opinion. The amount you can learn is almost endless!

Over here, you can learn quite a bit about how to press flowers, how to make pressed flower cards, and what flowers press well, just to name a few. You can access all of my tutorials here: Elizabeth's Flowers Tutorials

For my non-flower pressing readers, here's a "how to" tutorial for you that I just love. See what you think...

Enjoy!

Labels: ,

Monday, April 06, 2009

Pressing Time


Finally, finally, FINALLY I've been able to begin pressing my crocuses, in between the rogue snow storms and spring deluges we've been having here in southern Wisconsin lately. After "tweeting" that I was pressing crocuses this past Saturday, I received a number of emails asking me about how to go about pressing them.

So, for my new readers, here's an update of a tutorial on "How to Press Crocus Flowers" I wrote a few springs ago. Enjoy pressing and capturing the beauty of your crocuses. They are such a welcome blessing from our Creator.

Labels: , , ,

Monday, June 30, 2008

How to press poppies


Here's what I've been doing today... pressing some of my really big (long?) scarlet poppies, along with their stems and leaves.

I'm pressing the flowers in my Microfleur, and the the 9-12" stems in a larger wooden microwave flower press, and the longest stems are being pressed in my "mega press".

I'm leaving most of the leaves right on the stems, but I'm also pressing some separately as well. Poppies hold their red color brilliantly, but when using the Microfleur, use several short cycles of 30 seconds or so with a rest of 5 minutes in between. The poppy season is short, so try pressing some for yourself soon!

Labels: , , ,

Tuesday, April 01, 2008

Daffodils

God made a masterpiece when He made daffodils, didn't He?

It's looking like spring might have been canceled in Wisconsin this year, but if you've been blessed with spring weather where you are, you might find this question and answer about pressing daffodils useful:

Dear Elizabeth,

I am an English A Level student currently studying art in my first year. For my exam I am creating a collage based around daffodils including photographs and painting but would also like to include dried out daffodils, but am at a loss where to start! I wanted to include a large proportion of the stem (to give a 'still planted' impression) so the microfleur press doesn't seem to be large enough!

Do you have an suggestions or advice? I'm sorry if I have missed anything already mentioned on your website (which is wonderful by the way!) about this specific flower. I appreciate that you obviously get a lot of emails but I await your reply as daffodils are, sadly, briefly seasonal.

Thanks, Rachel

Dear Rachel,

Thank you for your kind compliment regarding my site. Your collage sounds like it will be very interesting! I'd love to see it.

If I were you, I'd press the flower in the Microfleur, and press the stem (and leaves?) separately in a large book. The stem and leaves will probably turn brown, but you could recolor them with a green leaf colored marker (Prismacolor markers are good). Also, since daffodil stems are thick, try slicing them in half.

Hope this helps!

Kind Regards, Elizabeth

Labels: , , , ,

Thursday, February 21, 2008

to blend or not to blend... question and answer

Hi Elizabeth:
Could you please answer a question for me. I have been surfing the web for information regarding paper-making. The one thing they all have in common is using a blender. I'd like to know if a food processor could be used instead. If not.....why a blender?? Just curious!!! I know you sell a paper-making kit which I may purchasing a little later.

Thank-you......... Val

Hi Val, Thanks for writing!

You know, I’m not sure! I don’t know that much about food processors – I only use mine for making bread dough or pesto. I do know that blenders are capable of “liquefying” just about anything, and for paper making you need enough power to separate and isolate each and every fiber so that it can be suspended in liquid. I don’t know if food processors are powerful enough for that.

On a more practical side, food processors can be quite expensive, and adequate blenders can be found for less than $20.00 at discount stores, or for even less at Goodwill, rummage sales, etc.

I would recommend getting a hold of an inexpensive blender, and using it only for paper making (it’s hard to get a blender really clean after making paper in it). Once you try paper making you’re sure to get hooked, and having a blender dedicated to paper making will be well worth your investment.

Speaking of making paper, my paper making kits have been out of stock for a number of weeks, because the man who was hand crafting the wooden frames used for the mold and deckles was unable to continue. Recently I've been able to obtain a limited number, so thankfully my paper making kits are back in stock for the time being. (Note: you might have to hit the "refresh" button in order to get rid of the "out of stock" message on my website)

I'm still looking for a skillful retired woodworker to hire, so if you know of anyone in south east Wisconsin or north east Illinois please let me know!


Labels: , , ,

Monday, February 18, 2008

Q & A: How to use PPA with large flowers

This weekend Lucy emailed me with the following questions:
1. After you put a dot of perfect paper adhesive on the back of the pressed flower to position it on the card the rest of the petals are loose. When you are done with flower placement how do you actually paint the product over the loose petals without tearing them?
2. I envision that when painted on a large flower the flower becomes fixed to the product on top but not to the card. The larger the flower, the less of it will be fixed to the card. Is the product so strong that even if only painted on top of the flower (that is not affixed to the card) that the flower will not break or tear when the card is bent?

Lucy, I am always quite generous when applying perfect paper adhesive to the backs of flowers. Generally I place a dot in the center, and then outline the entire flower, including each and every petal with PPA. In the case of a wide flower like this pansy, I also radiate outwards from the center as well. If I was using a large petaled flower, such as a cosmos, I would outline each petal with PPA, and then I'd also "zig zag" it down the center of each petal. In the picture above I applied the PPA with the small 1 oz bottle, but for larger flowers, or even ferns, you might find it easier to paint it on with a small brush.

When applying perfect paper adhesive to flowers used in framed art it's not quite as crucial to glue the flowers down so meticulously, but when using them for cards, those poor flowers will be going through a war, so to speak. However, I have found that if the flowers are well adhered, and then another coat of PPA is applied to the top of the flowers and greens, they will withstand their trip through the postal system, and be able to tolerate normal flexing and bending of the card. For best results, let freshly adhered pressed flowers dry thoroughly before applying the top coat with a soft brush. Remember, the top coat should be a thin coat- if you see white when you're applying it your using too much.

Thank you for your questions, Lucy - I hope I answered them adequately. Please let me know if you have any others!

Labels: , ,

Thursday, January 24, 2008

How to store pressed flowers

Reader friend Val recently asked:

"Elizabeth,
I'm having a bit of a dilemma. I have pressed and purchased so many flowers/botanicals over the past few years and I am now at my wits end trying to store/display them so I can find what I am looking for at a glance.

You know how it is when you are looking for just the right little piece of grass or leaf that curls in the right direction. Is there some way I can store all my large/small leaves, grasses, large/small pressed flowers, and all the bits and pieces that I need to find quickly and yet keep them all safe...flat...and accessible?

I have used small rectangular plastic tubs with lids and placed sheets of wax paper and thin cardboard to separate the different kinds of flowers etc. But it is becoming increasingly difficult and time consuming to lift out all the sheets until I find just the right piece I am looking for. There has to be a simpler way to organize these items.

I know that you probably have ten times the amount of pressed flowers etc. than I do and your time is precious as well. How do you keep yourself organized? Any help you could give me would be great!!!! Thanks in advance.....Val"
___________________________________________

Thanks so much for your question, Val. It is one that I continue to wrestle with, but I have come up with a few innovations for storing my pressed flowers that are working for me, and I also am aware of some storing techniques that other pressed flower artists use.

Read more about storing pressed flowers

Labels: , , ,

Monday, November 05, 2007

How to make pressed flower cards

I frequently get asked by readers and customers how I make my pressed flower cards, and I’ve always been happy to share about my techniques on my l blog, or via personal emails.

But, after making my cards the same way for years and years, I recently completely changed my technique.

I’ve told many of you that I have tried a number of adhesives, and that I swear by Elmer’s Glue. Well, not any more. Now only use Perfect Paper Adhesive.

Also, I never protected the pressed flowers on my cards. I assumed the handmade paper I mounted my flowers on would be sturdy enough to get them through the mail.

I’ve changed my mind. Now, I always protect my pressed flower cards with a thin application of a tough, flexible, UV resistant and acid free sealant. It’s barely perceptible and it makes me pressed flower cards as tough as nails. Conveniently, the sealant I use just happens to be the adhesive I use: Perfect Paper Adhesive.

I wrote about my discovery of Perfect Paper Adhesive(PPA) just a few weeks ago, and soon after I was contacted by the maker of PPA, and invited to sell it on my website. I was thrilled! So now, you can purchase Perfect Paper Adhesive at Elizabeth's Flowers, if you’re interested. And, if you’d like to check it out, I’ve re-written my tutorial on “How to Make Pressed Flower Cards”.

Happy creating!

Labels: , ,

Tuesday, May 01, 2007

Good old Elmer's

Hi Elizabeth,

I am having sooooo much fun with the Microfleur flower press I ordered from you. I am making all kinds of cards. Birthday, graduation etc.
I am using dogwood blooms. I read somewhere that if you use a white flower you will need to treat it, in order for it to stay white. Is this true? If so what do I use?

Also, I am covering them with a clear paper and gluing the edges. Do you cover yours? What kind of glue do you use?
Thank you so much!

Nancy from Oklahoma

Dear Nancy,

I’m thrilled to hear that you are enjoying your new Microfleur and making lots of cards! Sorry that it took me so long to get back to you, but I’ll try to answer all your questions.

Regarding white flowers: I don’t press a lot of white flowers, but you’re right, they do tend to turn an ivory color after awhile. I have heard that people who use standard air flower presses (not the Microfleur) use Bon Ami cleanser… they put a little in a plastic zip lock bag and shake it very carefully, and then dust off the excess, and press as usual. I don’t know about using this method with the Microfleur in the microwave – I would worry about possible fumes from the cleanser. I have occasionally touched up Queen Anne’s Lace with diluted white acrylic paint to enhance their whiteness after pressing, and perhaps that would work with your dogwood blossoms.

I don’t cover the flowers on my cards with anything, although I know a number of pressed flower artists use clear contact paper. I glue down my pressed flowers well on a fairly thick piece of handmade paper, which is then mounted on heavy cardstock, so the flowers have a sturdy, stiff foundation to rest on, which protects them from the average trip through the US mail.

I have tried a number of different glues, including a pricey “botanical glue”, but have always come back to plain old Elmer’s Glue. It’s strong yet gentle on flower tissues, and best of all, it’s inexpensive! I buy it in the small children’s bottles, which are just the right size for precise control. Note: I now only use Perfect Paper Adhesive to adhere my pressed flowers!

There! I think that I’ve answered all your questions, but if you have more, just ask!

Kind Regards,

Elizabeth

Labels: , , , ,

Tuesday, April 10, 2007

Pressing African Daisies in the Microfleur

Note: Every so often I get specific questions from readers. I've decided to start sharing a few of them with you. If you have any questions regarding flower pressing techniques, flower garderning questions, or starting up your own handmade card business, please feel free to ask. I'd love to help!

Hi Elizabeth,

Have you tried pressing African daisies with the Microfleur? If you have, could you tell me how you do it? I either burn them or undercook them. Thanks!
Andria from California

Hi Andria,

Yes, I press osteospermum which are part of the same family, and they can be a bit tricky. But, the results are well worth it!

First of all, for best results, try to pick young flowers, as soon as they’ve fully opened, after the morning dew has dried.

To avoid scorching them, I press them in the Microfleur for two or three 30 second intervals with a minute or two between each interval. Then, leaving the flowers inside the cotton liners, I place them on the counter and allow them to fully cool, and then press them again for one or two more 30 second intervals after they’ve rested. If I’m pressing many of them, I might let them sit out overnight, and complete their pressing the next morning.

Keep in mind every microwave is different, but the main point is to let them cool in between microwave intervals. I hope this helps, Andria!

Elizabeth


Labels: , ,

Friday, May 26, 2006

Microfleur Flower List


Flowers that press well using the Microfleur Microwave Flower Press:

For those of you who are new to pressing flowers, I’d like to initiate a list of flowers which press well with the Microfleur Microwave Flower Press. (I’ve mentioned before that the Microfleur press is the main press I use – I think it’s wonderful!) The flowers listed below are flowers that I have found to consistently press beautifully in the Microfleur. I will be adding to this list from time to time, as I come across new flowers.

Also, please feel free to email me with your own discoveries, and I’d be happy to add them to our list!

- babies breath
- black-eyed-susans (Small ones. I grow a wild variety in the shade to keep them petite)
- borage flowers
- calendula (Flowers only. Sometimes the foliage burns when microwaved!)
- chamomile

- chive flowers (However, your Microfleur pads will smell like onions for quite sometime!)
- chrysanthemums
- common daisies
- coreopsis
- cosmos
- crocus
- delphinium
- edelweiss
- English daisy
- flax (the scarlet flax darkens to a pretty burgundy color)
- forget-me-nots
- heuchera flowers
- hydrangea blossoms
- larkspur
- lavender (they smell wonderful as they are being pressed!)
- lobelia (especially the red, purple, and blue types)
- orchids (the small fuchsia type. The flowers must be carefully dismantled before pressing)
- osteospermum (these are tricky, but the results can be well worth the effort)
- pansies
- poppies (not the orange California poppy. They press well initially, but fade within days!)
- potentilla flowers
- pelargonium (perennial geranium species)
- roses (I don’t often choose to press them, but the red and deep pinks retain color well)
- scabiosa
- tickseed
- tulips (I’ve been successful with red, yellow, and lavender colors)
- trascantia/spiderwort (They fade within a few years, but look wonderful initially)
- Queen Anne’s Lace (One of the few flowers that press almost as well in a phone book!)
- verbena (Some types darken slightly, but overall they are well worth the effort)
- violas
- wild or woodland violets


Are you looking for a
Microfleur Microwave Flower Press? I am thrilled to have been appointed a US distributor of the Australian made Microfleur.


Labels: , ,

Tuesday, April 04, 2006

Microfleur Tutorial: How to Press Crocus Flowers


I was thrilled to find out a few months ago that I would be allowed to be a U.S. distributor of the Microfleur Microwave Flower Press. I bought my Microfleur press 5 years ago this May, and since then it has been in almost constant use. I am constantly amazed at how well it works in preserving the brilliant colors of flowers and foliage, almost instantly!

The following is the first in a series of flower pressing tutorials, using the Microfleur Flower Press.

“How to Press Crocus Flowers using the Microfleur”

Happy Pressing!

The Microfleur is designed and manufactured by Beeline Products Pty Ltd, of Queensland, Australia.

Labels: , ,